From Berry to Bloom: How to Grow Clivias from Seed
Growing Clivias from seed is one of the most rewarding experiences for gardeners and collectors alike. While it requires patience and careful attention, nurturing your own Clivias from pollinated berries allows you to expand your collection and create unique hybrids. With the right steps, you can transform tiny seeds into strong, healthy plants that bloom for years to come.
1. Harvesting Clivia Berries
After flowering, properly pollinated Clivias form berries. These berries remain green for several months, sometimes up to a year, before ripening. You’ll know they’re ready when they soften under gentle pressure and show colour ranging from yellow to deep red.
Tips for harvesting:
Pick or cut carefully: Either pluck berries from the plant or cut the stem. If cutting, dust the wound with fungicide or Flowers of Sulphur to prevent infection.
Drying: Let berries dry for 5–7 days in a shaded, ventilated area. This makes cleaning easier.
Label: Keep berries organized by colour or parent plant to maintain accurate records for future germination and hybrid tracking.
2. Cleaning and Preparing Seeds
Proper cleaning ensures healthy germination:
Remove all outer skin, pulp, and membranes.
Rinse seeds in diluted dishwashing liquid to remove residues.
Pat dry with a paper towel and lightly dust with a contact fungicide.
Store in a ventilated container if you are not germinating immediately.
3. Germinating Clivia Seeds
Clivia seeds can be started immediately after harvest or in warmer spring temperatures:
Place seeds between damp paper towels, or on top of moist peat moss or sterilised sand in a container.
Keep containers in a warm, shaded location; a heated germinator can speed up the process.
Monitor moisture closely—soil or paper towels should be damp but never soggy.
Seedling tip:
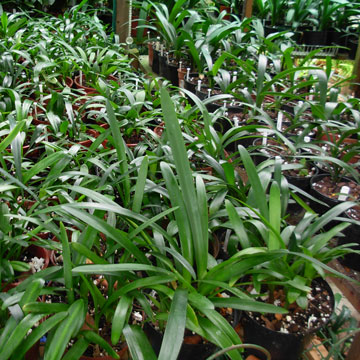
4. Potting Out Young Seedlings
At about 12 months, move seedlings into individual 10–12 cm pots.
Ideal potting mix: milled pine bark, filter sand, and ecoT (beneficial fungi).
Keep seedlings in dappled shade and water consistently without overwatering.
Avoid excessive fertiliser at this stage; a light liquid feed every 4–6 weeks is sufficient.
5. Potting-On as Clivias Mature
Clivias grow slowly, so gradual potting helps build strong roots:
2 years old: Move to 17.5 cm pots, adding drainage at the base using crushed stone, brick, or polystyrene.
3 years old: Pot into 20 cm containers, watering before transplanting to minimise root disturbance.
Pro tip: Rotate pots occasionally to ensure even light exposure and remove dead leaves to prevent pests.
6. Caring for Seedlings and Mature Plants
Water carefully—allow soil to dry slightly between waterings.
Use slow-release fertiliser in spring and autumn; a seaweed supplement can boost bud formation.
Watch for pests like mealie bugs and apply biological insecticide if needed.
Division of plants every 3–5 years encourages stronger blooms in the future.
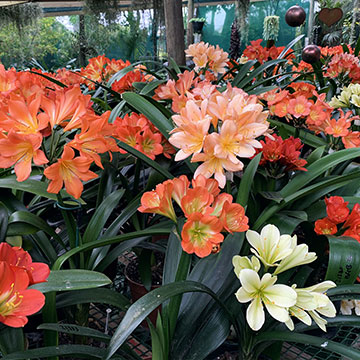
Fun fact: Planting yellow and orange Clivias together doesn’t change flower colour, but seeds from cross-pollination can yield exciting new shades.
7. Patience Pays Off
Clivias are slow-growing, but the results are spectacular. From tiny seeds, you can grow strong, healthy plants ready to bloom in 3–5 years. Each plant carries the potential for unique colour and hybridisation, making seed-grown Clivias a rewarding and long-lasting investment for your garden or collection.
Extra Tips for Success
Keep records of parent plants and seed colour for accurate hybrid tracking.
Avoid excessive sunlight and ensure good air circulation to prevent fungal issues.
Mulch around seedlings and mature plants to retain moisture and regulate soil temperature.
Consistent care—watering, feeding, and pest monitoring—produces the healthiest blooms.